
The monotub is the single most popular cultivation method for home growers — and for good reason. It scales well, requires minimal intervention once set up, and produces reliable flushes without advanced sterile technique. But most beginners either overbuild it or underthink it. This guide covers the actual mechanics: what a monotub is, how to set one up correctly, and which variables actually matter.
What Is a Monotub?
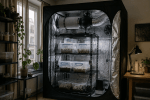
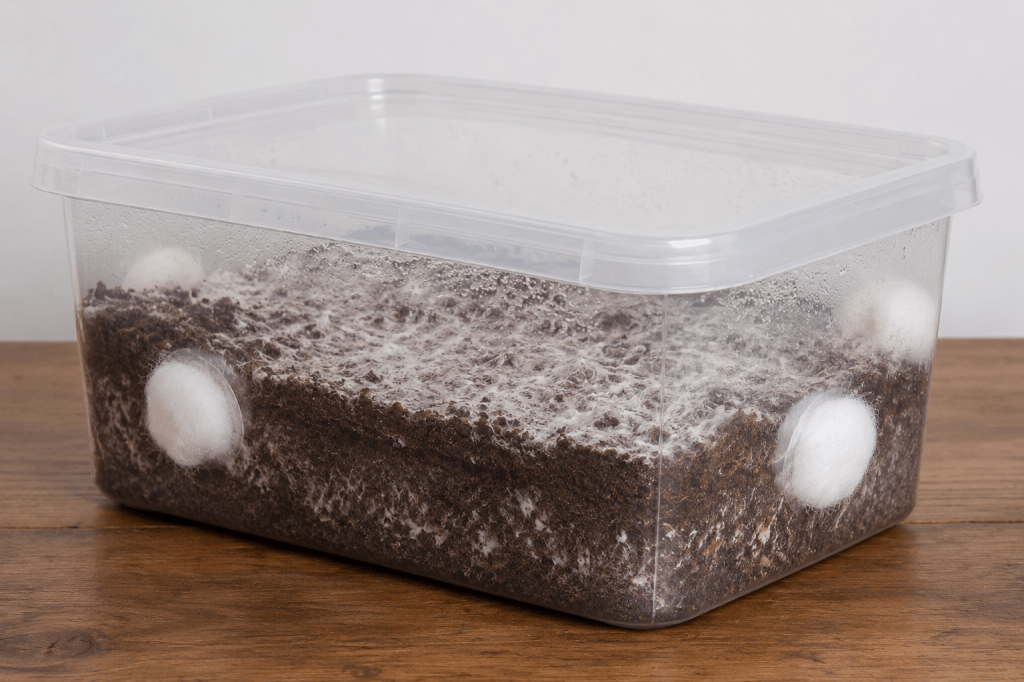
A monotub is a large, lidded plastic storage container used as a self-contained fruiting chamber. The core idea: mix colonized grain spawn with a bulk substrate (usually coco coir and vermiculite), load it into the tub, and let the mycelium finish colonizing in a semi-controlled environment before triggering fruiting conditions.
Unlike PF tek jars that need to be birthed and placed in a separate fruiting chamber, the monotub is an all-in-one system. The tub itself is both the colonization vessel and the fruiting chamber. That simplicity is why it works so well for beginners dealing with limited space or equipment.
Why Monotubs Work for Beginners
Most beginner failures happen at the fruiting stage — not because the mycelium is weak, but because the environment is wrong. Temperature swings, inadequate fresh air exchange, or improper humidity all compound into failed pins or aborts. The monotub addresses this by creating a stable microclimate with a large substrate mass that buffers against external fluctuations.
A larger substrate volume also means more nutritional reserves, which translates to heavier and more consistent flushes compared to small PF tek cakes. For most growers, a single monotub outperforms a dozen small cakes with far less active management.
The monotub works because it removes you from the equation. Once environment is dialed in, mycelium does the rest.
What You Need to Build a Monotub
The Container
Use a clear or translucent plastic storage tub — 50 to 110 liters depending on your ambitions. Ikea Samla and Sterilite tubs are commonly used in Europe due to their tight-fitting lids. Avoid tubs with opaque walls; you need to monitor mycelium growth and contamination without opening the lid.
Drill or cut four to six holes (roughly 5 cm in diameter) along the upper sides of the tub — two per long wall, one per short wall. These will be stuffed with polyfill for passive fresh air exchange (FAE). Placement matters: holes too low let CO₂ pool at substrate level; holes too high reduce surface-level air movement.
Bulk Substrate
The standard bulk substrate for monotubs is a 50/50 mix of coco coir and coarse vermiculite, hydrated to field capacity. Field capacity means the substrate holds moisture without water dripping when squeezed firmly in your fist. This ratio creates a substrate that retains humidity, has good structure for pinning, and resists contamination through high water activity and pH.
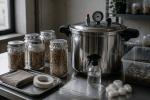
For a 66-liter tub, plan on roughly 8–10 liters of dry coco coir brick expanded with hot water, mixed with an equal volume of coarse vermiculite. Pasteurize the mix (not sterilize) by bringing it to 70–82°C for 1–2 hours — this kills competitor molds while leaving beneficial microbial communities that help suppress contaminants.
Grain Spawn
Grain spawn is colonized grain — rye berries, wheat berries, or oats — fully run with mycelium. You can buy colonized grain jars from reputable vendors, or produce your own if you have the sterile technique for it. For a 66-liter tub, 2–3 liters of grain spawn is the typical inoculation rate (roughly a 1:3 to 1:5 spawn-to-substrate ratio).
Higher spawn rates colonize faster and reduce contamination risk but increase cost. Lower spawn rates stretch your spawn further but extend the colonization window. For beginners, err toward higher spawn ratios.
Polyfill for FAE
Polyfill stuffed into the tub holes provides passive fresh air exchange — it allows CO₂ to diffuse out and O₂ to enter while blocking particulates that carry contamination. Use the same polyester fiber found in craft stores or pillow stuffing. Pack it firmly enough to resist insects and drafts, but not so tightly that airflow is blocked entirely.
Step-by-Step Monotub Setup
- Prepare the tub. Drill FAE holes, wipe interior surfaces with isopropyl alcohol (70%), and let dry completely.
- Hydrate and pasteurize your bulk substrate. Mix coco coir and vermiculite, add boiling water to field capacity, cover, and let cool to room temperature (12–18 hours).
- Mix spawn into substrate. In a clean environment, break up grain spawn and mix thoroughly into the cooled substrate. Distribute evenly to reduce colonization time and hotspots.
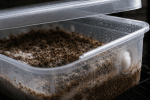
- Load the tub. Pour the spawn/substrate mix in, level it to a depth of 7–10 cm. Avoid packing it down — loose structure promotes pinning.
- Colonize in darkness. Seal the lid, stuff polyfill in the holes, and leave in a dark space at 21–24°C. Check through the tub walls for signs of contamination. Do not open the lid during colonization.
- Trigger fruiting. Once the surface is fully covered in white mycelium (10–18 days typically), introduce fruiting conditions: drop temperature to 18–21°C, increase indirect light (12 hours/day), and fan briefly once or twice daily.
Humidity and FAE: The Most Misunderstood Variables
Most beginner guides say “keep humidity at 90–95%” without explaining why, or how, or when this actually matters. During colonization, humidity within a sealed tub is naturally high — the substrate holds moisture and the lid traps it. You don’t need to spray or mist during this phase. Opening the lid during colonization introduces contamination risk with essentially zero benefit.
During fruiting, pins form in response to high surface humidity, a drop in CO₂ (from fanning), and light cues. The surface should never dry out — it should look visibly moist but not pooled with standing water. If the surface is cracking or lightening in color, mist lightly and fan immediately after.
FAE matters more than most beginners realize. Elevated CO₂ suppresses pinning and promotes leggy aerial mycelium. Fanning the tub once or twice a day — just 30–60 seconds — drops CO₂ and cues the mycelium to fruit. Without this, many tubs stall at the rhizomorphic growth stage without ever pinning. For accurate monitoring, see our guide to choosing a mushroom hygrometer.
Common Monotub Mistakes
- Opening the lid too often during colonization. Every time you open it, you introduce unfiltered air. The polyfill holes exist precisely so you don’t need to.
- Substrate too wet. Water pooling at the bottom creates anaerobic zones where bacterial contamination thrives. Always test field capacity before loading.
- No FAE holes, or holes that are blocked. A completely sealed tub leads to CO₂ buildup, which stalls colonization and prevents pinning.
- Temperature too high. Above 26°C, contamination species gain competitive advantage. Keep colonization temperatures moderate.
- Harvesting too late. Caps that have fully opened and begun dropping spores are past peak potency and affect subsequent flushes. Harvest just before or as the veil breaks.
For a broader look at environmental mistakes that derail beginner grows, see Why Most Beginner Mushroom Grows Fail. If you’re comparing cultivation methods, Indoor Mushroom Cultivation Systems covers the full range of options.

Leave a comment